- Why Build Your Own Wind Turbine?
- How Wind Turbines Work — The Principles in Simple Terms
- Lift and Drag
- Power Available in Wind
- Tip Speed Ratio (TSR)
- Deciding What Kind of Turbine to Build
- Horizontal Axis Wind Turbines (HAWT)
- Vertical Axis Wind Turbines (VAWT)
- Step 1 — Assessing Your Site and Wind Resource
- Wind Power vs. Wind Speed — Quick Reference
- Step 2 — Choosing a Generator Type
- Step 3 — Blade Design and Material Choices
- Common Blade Materials
- Blade Dimensions and Shape
- Balancing and Pitch
- Step 4 — Hub, Shaft, and Mechanical Assembly
- Step 5 — Tower and Foundation
- Tower Types
- Foundation and Anchoring
- Raising and Lowering Mechanisms
- Step 6 — Electrical System: Controllers, Batteries, and Inverters
- Wiring and Grounding
- Step 7 — Controls, Braking, and Safety Systems
- Step 8 — Tools, Materials, and a Typical Parts List
- Estimated Cost Table (Typical Small DIY Turbine)
- Step 9 — Building — A Practical Step-by-Step Overview
- Step 10 — Testing, Tuning, and Troubleshooting
- Maintenance and Longevity
- Legal Considerations and Permits
- Safety: Protect Yourself and Others
- Common Mistakes and How to Avoid Them
- Practical Tips and Tricks from Experienced DIYers
- Resources, Plans, and Further Reading
- Pros and Cons — Is a DIY Wind Turbine Right for You?
- Real-World Example: A Simple Backyard Turbine Project
- Keeping It Sustainable and Responsible
- When to Consider Buying a Kit or Hiring a Professional
- Checklist Before You Start Building
- Final Thoughts on the Journey
- Conclusion
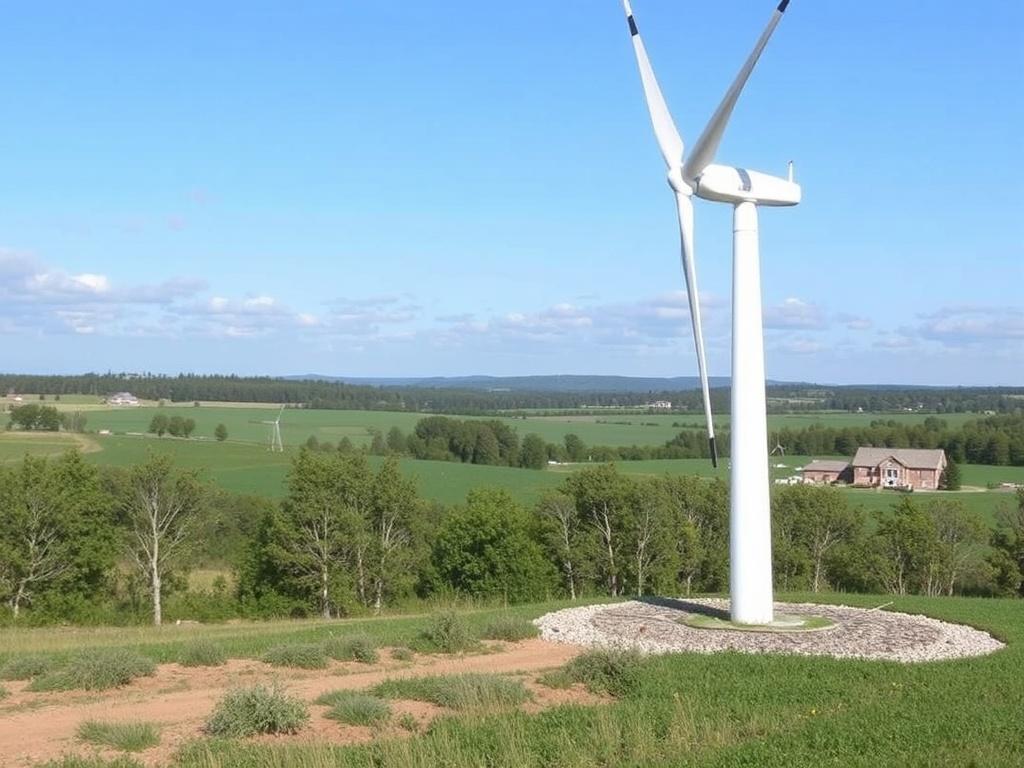
There’s something quietly hopeful about seeing a homemade wind turbine slowly turning on the horizon. It’s a small, satisfying proof that you can take control of where your energy comes from and learn a handful of useful skills in the process. Whether you’re dreaming of powering a tiny cabin, charging batteries for off-grid projects, or simply experimenting with renewable tech, building your own wind turbine is a rewarding project that combines mechanics, electronics, and a little bit of design. In this long, conversational guide I’ll walk you step by step through everything you need to know: planning, materials, safety, building basics, testing, and keeping your turbine humming for years.
Why Build Your Own Wind Turbine?
Before diving into nuts and bolts, let’s talk about why you might want to build one yourself. For many people, it comes down to three things: cost savings, education, and independence. Commercial turbines are expensive and often scaled for grid-tie installations. A DIY turbine can be much cheaper for small-scale needs, and the learning process — understanding aerodynamics, gear ratios, and electrical systems — is worth the effort for makers and curious learners. Finally, a small turbine can provide energy independence for remote cabins, emergency backup, or complementing solar panels for a hybrid off-grid system.
But building your own turbine is not a magic solution. It requires time, patience, and respect for local regulations. You’ll need to think about wind resource, structural safety, electrical safety, and long-term maintenance. Done well, it’s a project that pays its way in knowledge, resilience, and sometimes money.
How Wind Turbines Work — The Principles in Simple Terms
To design or build a wind turbine, you don’t need to become an aerodynamicist, but you do need to grasp a few basic ideas:
Lift and Drag
Blades convert wind energy into rotational motion by using aerodynamic forces. Lift, created by a difference in air pressure over a curved blade, is the main driver for modern blades. Drag is the resisting force from air pushing back on the blade. Good designs maximize lift and minimize drag.
Power Available in Wind
The power in wind increases with the cube of wind speed. That means a modest increase in wind speed drastically increases potential power. However, only a fraction of that power can be captured; Betz’s limit tells us a turbine cannot capture more than 59.3% of the kinetic energy in wind. Practical small turbines capture less, often 20–40% depending on design and conditions.
Tip Speed Ratio (TSR)
This is the ratio between the speed of the blade tip and the wind speed. Different blade designs (number of blades, shape) have different optimal TSRs. High-TSR designs (3–8) typically use fewer blades and spin faster; low-TSR designs (1–3) use more blades and spin slower.
Deciding What Kind of Turbine to Build
There are two broad categories:
Horizontal Axis Wind Turbines (HAWT)
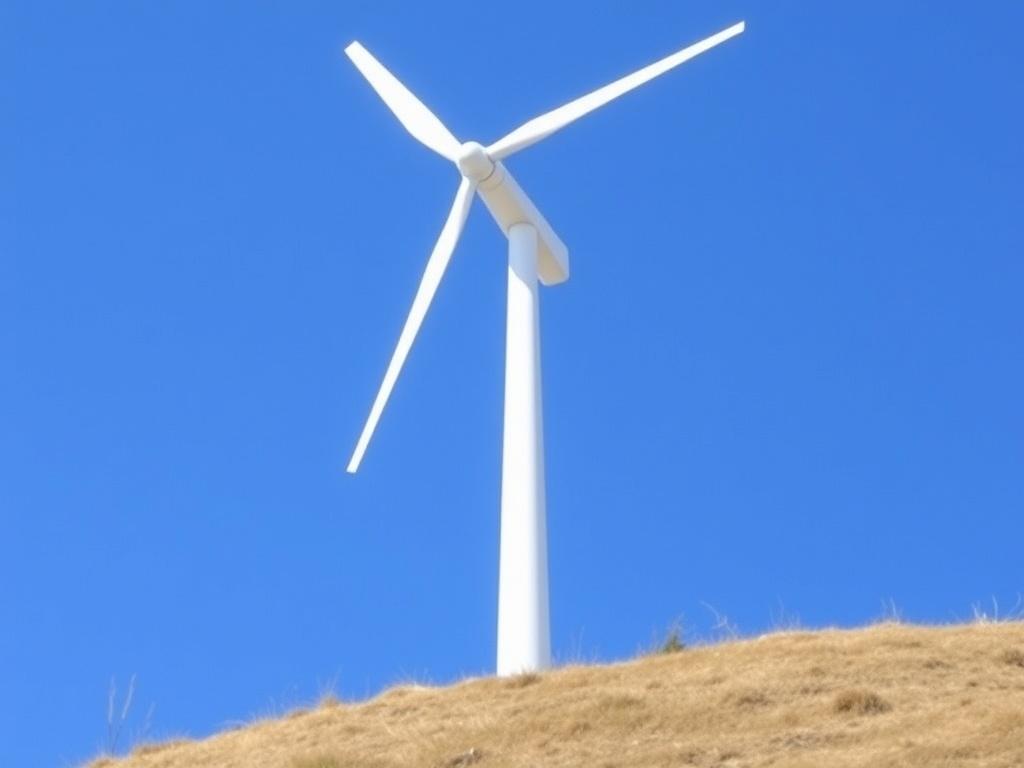
These look like small versions of large commercial turbines: a rotor on a horizontal axis (blades rotate in a plane perpendicular to the wind). They tend to be more efficient and are the usual choice if you want higher output.
Vertical Axis Wind Turbines (VAWT)
These rotate around a vertical axis and can accept wind from any direction without yaw mechanisms. They’re simpler to place in turbulent, urban environments and are forgiving for DIY builds. However, they’re generally less efficient.
Your choice depends on your site, resources, mechanical skill, and aesthetic preference. For most readers aiming to maximize energy on a modest budget and willing to work with a tower and a yaw system, a small HAWT (3-blade, moderate diameter) is often a practical choice.
Step 1 — Assessing Your Site and Wind Resource
Before cutting wood or buying a generator, study the wind at your location. This will determine whether a turbine is a worthwhile investment.
- Measure or obtain local wind speed data. If you don’t have an anemometer, consult local weather stations or wind maps. Average wind speeds above 4–5 m/s (9–11 mph) are often considered the lower practical limit for small turbines.
- Consider turbulence. Trees, buildings, and hills create turbulent gusts that reduce turbine efficiency and increase mechanical stress.
- Height matters. Wind speed typically increases with height above ground. A taller tower can dramatically improve energy capture.
- Setback and safety. Ensure there’s a safe distance between the turbine and people, dwellings, and power lines.
Wind Power vs. Wind Speed — Quick Reference
| Average Wind Speed (m/s) | Practical Use | Notes |
|---|---|---|
| 0–3 | Not practical | Too light except for micro-applications |
| 3–5 | Low power | May work for small battery charging with optimized turbine |
| 5–7 | Reasonable | Good potential for small home systems |
| 7–10 | High potential | Well suited to small turbines; better payback |
| 10+ | Excellent | High energy capture but higher mechanical stress |
Step 2 — Choosing a Generator Type
The generator is the heart of your turbine. Several options exist depending on your goals and skills.
- Permanent Magnet Generator (PMG): Efficient and popular for DIY turbines. They can produce voltage at low RPMs and are reliable if matched to the rotor properly.
- Car alternator: Cheap and often repurposed by hobbyists. However, alternators usually need an excitation source to produce power and are optimized for high RPMs, so they may require gearing.
- Wind-specific brushless generators: Readily available from vendors; often new and designed for low RPMs but more expensive.
- Stepper motors or DC motors: Can be used for very small turbines or experiments but typically aren’t efficient for continuous power generation.
When choosing, match generator speed-torque characteristics to your rotor. High-tip-speed rotors often need generators capable of high RPMs, or you can gear down/up as needed. For most practical small HAWTs, a PMG or dedicated low-speed generator is ideal.
Step 3 — Blade Design and Material Choices
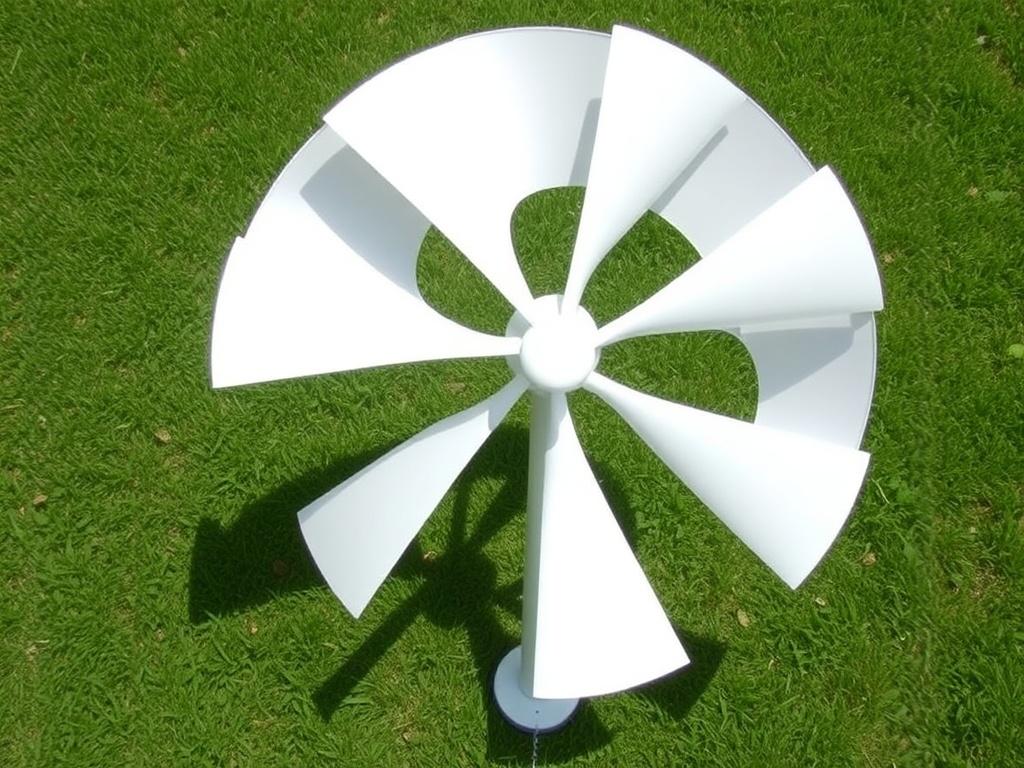
Blades are where aerodynamics meets materials. You can buy pre-made blades, machine your own from foam and fiberglass, or craft wooden blades. Each approach has trade-offs.
Common Blade Materials
- Fiberglass over foam: Lightweight, strong, and aerodynamic if shaped well — excellent performance but requires composite skills.
- Wood (laminated or carved): Readily available and forgiving; heavier than composites but simple to shape and repair.
- PVC pipe or repurposed materials: Cheap and okay for experiments; performance is modest and lifespan varies.
Blade Dimensions and Shape
Blade length (radius) largely determines swept area and power. Longer blades capture more energy but require stronger structural support and higher tower. Blade chord (width), twist, and airfoil section determine aerodynamic efficiency. For a DIY project, using simple, proven profiles and ensuring consistent blade shape and balance is more important than chasing a specialized airfoil.
Balancing and Pitch
Balanced blades minimize vibration and stress. You can adjust weight with small additions to balance, and some DIY turbines include pitch control to reduce power and loads in high winds. Fixed-pitch blades are simpler and common in small projects.
Step 4 — Hub, Shaft, and Mechanical Assembly
The hub connects blades to the shaft and transfers torque to the generator. It must be robust and well-aligned.
- Use bearings sized for expected loads and rated for outdoor use.
- Ensure the shaft is straight and properly aligned to avoid wobble and premature wear.
- Consider a slip ring or quick-release if you need to remove the rotor easily for maintenance.
If you are using a gear or belt drive to match rotor RPM to generator RPM, design for proper tensioning and protection from weather and debris.
Step 5 — Tower and Foundation
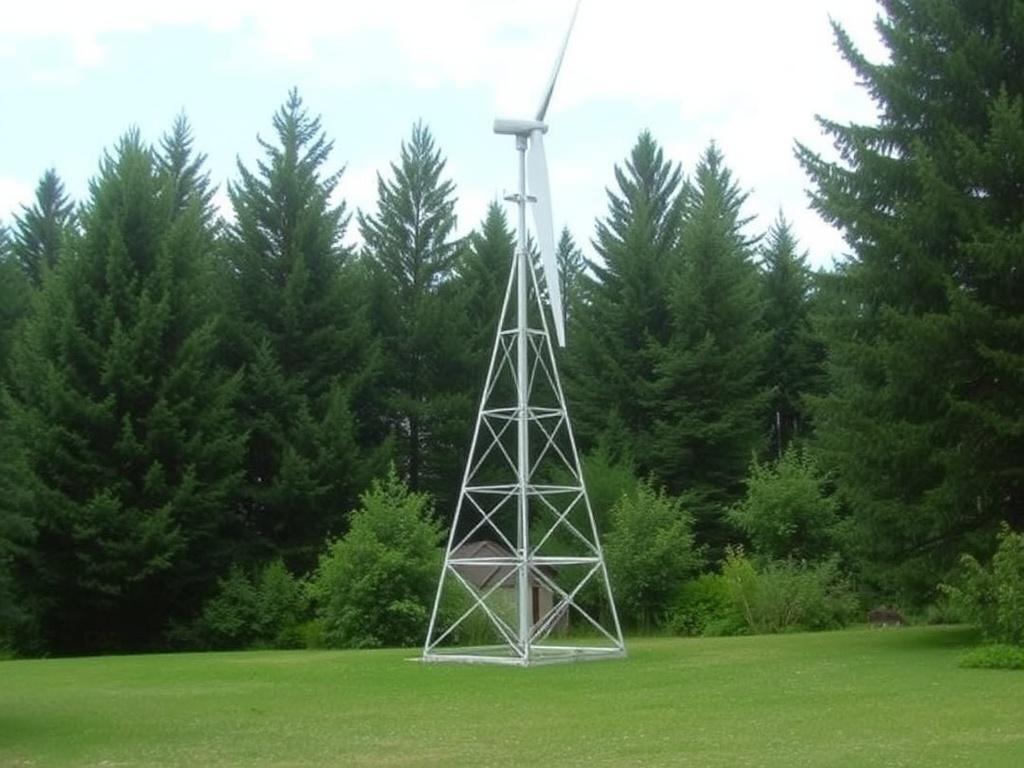
A good tower is crucial. It raises the rotor into stronger, smoother wind and must safely carry loads.
Tower Types
- Free-standing steel lattice towers: Strong but more expensive and heavy.
- Guyed tubular towers (metal or PVC): Cost-effective, lighter, but need anchor points and tensioned guy wires.
- Pole-mounted towers (wood or steel): Simpler for very small turbines but still need sound anchoring.
Foundation and Anchoring
A secure foundation depends on tower type and soil. Concrete footings, driven anchors, or deadman anchors are common. If using guy wires, ensure anchors are angled and sized for loads and inspect them periodically.
Raising and Lowering Mechanisms
For maintenance, a tilt-up tower or hinged mast is useful. Plan safe procedures for raising and lowering your turbine and ensure guys lock off securely during operation.
Step 6 — Electrical System: Controllers, Batteries, and Inverters
Your generator produces electrical power, but to use it safely and efficiently you’ll need a simple electrical system:
- Charge Controller: Prevents overcharging batteries. Wind charge controllers can dump excess energy into a resistor (dump load) to prevent battery damage during high winds.
- Batteries: Deep-cycle batteries store energy. For off-grid setups, you’ll likely choose lead-acid or lithium options with proper sizing for expected loads.
- Inverter: Converts DC battery power to AC to run household appliances. Choose sine-wave inverters for sensitive electronics.
- Fuses, Disconnects, and Surge Protection: Safeguards for you and your equipment — include fuses on both AC and DC sides and a main disconnect switch.
Wiring and Grounding
Use appropriately sized cables to reduce voltage drop and ensure proper grounding to protect against lightning and static buildup. If your system will ever connect to the grid, follow local utility regulations and use an inverter and isolation equipment that comply with standards.
Step 7 — Controls, Braking, and Safety Systems
Wind speeds can increase suddenly. A good turbine needs ways to protect itself and nearby structures.
- Passive furling or tail vane: Allows the turbine to turn out of high winds.
- Active brakes: Mechanical or electrical brakes you can engage for maintenance or extreme conditions.
- Dump Loads: Automatic circuits that absorb excessive electrical production to prevent battery overcharge.
- Overspeed protection: Blade pitch control or aerodynamic braking to reduce RPM in dangerously high winds.
Design your safety features to fail-safe where possible — for example, mechanical brakes that default to engaged if a cable snaps.
Step 8 — Tools, Materials, and a Typical Parts List
Here’s a practical list to get started. You don’t need all of these right away, but they’ll give you a sense of the scope.
- Generator (PMG or wind-specific unit)
- Set of blades (fiberglass, wood, or PVC)
- Hub and high-quality bearings
- Shafting and coupling
- Tower sections and guy wire with anchors
- Charge controller, inverter, batteries
- Electrical components: breakers, fuses, disconnects, wiring
- Tools: drill press, angle grinder, wrenches, sockets, torque wrench
- Composite supplies if shaping blades (foam, resin, fiberglass cloth)
- Safety gear: gloves, eye protection, harnesses for working at height
Estimated Cost Table (Typical Small DIY Turbine)
| Component | Low-Budget Estimate | Higher-Quality Estimate | Notes |
|---|---|---|---|
| Generator | $150 | $700 | Car alternator vs PMG/wind generator |
| Blades (set) | $50 | $600 | PVC or wooden vs fiberglass-professional |
| Hub, bearings, shaft | $100 | $400 | Depends on materials and machining |
| Tower & foundation | $200 | $1,200 | Guyed vs freestanding |
| Controller & electronics | $150 | $900 | Simple dump controller vs smart MPPT and inverter |
| Batteries (bank) | $200 | $2,000 | Depends on chemistry and capacity |
| Misc (wiring, fasteners, tools) | $100 | $600 | Anchors, wiring, protective boxes |
| Total | $950 | $6,400 | Wide range depending on scale and quality |
Step 9 — Building — A Practical Step-by-Step Overview
Here is a practical sequence you might follow. I won’t give machine-shop-level specs, but this outlines a clear path.
- Finalize design and materials. Decide rotor diameter, generator type, tower height, and battery capacity based on your site data.
- Acquire or make blades. If fabricating, create accurate molds and ensure balance. If using wood, laminate for strength and seal for weather resistance.
- Construct hub and attach blades, ensuring precise alignment. Use strong fasteners and locking mechanisms for safety.
- Assemble generator and shaft coupling. Test for smooth rotation and minimal axial or radial play.
- Build or prepare tower and foundation. Get help for lifting heavy sections. Install grounding rod and prepare anchor points for guys.
- Install electrical system at ground level: charge controller, batteries, inverter, safety disconnects. Wire with appropriately sized cabling ready for turbine connection.
- Mount turbine to tower and secure guy wires. Verify rotor clearance and ability to yaw if HAWT.
- Perform a pre-start checklist: balance check, electrical continuity, safety switch operation, brake tests, and cable routing checks.
- Initial start-up during a calm day. Observe behavior, check voltages and RPMs, monitor for vibration or heating.
- Tune controller settings and dump load behavior. Monitor over days and weeks and make adjustments for optimal charge control and safe furling.
Step 10 — Testing, Tuning, and Troubleshooting
After installation, spend time monitoring:
- Voltages and currents at different wind speeds to ensure charge profile matches battery specifications.
- Vibration, noise, and bearing temperature. Excessive vibration often signals imbalance, misalignment, or worn bearings.
- Mechanical wear points: bolts, hub connections, and tower anchors. Tighten and grease as needed.
- Electrical safety: inspect fuses, switches, and insulation after storm events or heavy winds.
Common problems and simple fixes:
- Low output: Check wind resource, blade pitch, generator matching, and wiring losses.
- Excess vibration: Rebalance blades, check alignment, replace worn bearings.
- Overcharging batteries: Calibrate or upgrade charge controller and confirm dump load function.
- Yaw issues: Check tail vane alignment or yaw bearing lubrication.
Maintenance and Longevity
Routine maintenance keeps a turbine healthy:
- Inspect blades and hub annually for cracks, delamination, or loose fasteners.
- Check bearings, grease regularly if they are serviceable, and replace if noisy or rough.
- Test electrical components and clean connections to avoid corrosion and resistance buildup.
- Inspect tower anchors and guy wires; re-tension as needed.
A well-built small turbine can last 10–20 years with proper care. Components like batteries and some electronic parts will require periodic replacement.
Legal Considerations and Permits
Before construction, check local regulations and utility rules. Some places require building permits, and grid-connected systems typically need an interconnection agreement and certified inverter. Even for small off-grid systems, zoning rules or homeowner association (HOA) covenants can apply. Failing to check can lead to fines or being required to remove the system.
Safety: Protect Yourself and Others
Safety is paramount. Working with towers, blades, and electricity can be hazardous.
- Work with a partner when lifting or erecting towers.
- Use harnesses and fall protection for tower work above a few feet.
- Disconnect electrical systems before touching wiring and use insulated tools where necessary.
- Plan for lightning and install proper grounding; consider lightning arrestors and surge protection on electronics.
- Observe weather conditions — don’t work on the turbine during strong winds or storms.
Common Mistakes and How to Avoid Them
Here are frequent pitfalls and simple ways to avoid them:
- Underestimating wind resource — measure or use reliable data before committing.
- Improper blade balance — spend time balancing to avoid vibration issues.
- Undersized wiring — calculate expected current and size cables to reduce losses.
- Poor grounding — invest in proper grounding to protect against lightning and static.
- Neglecting maintenance — schedule inspections and simple repairs before they grow.
Practical Tips and Tricks from Experienced DIYers
These are the kind of lessons you mostly learn by doing, so keep them in mind:
- Start small. It’s better to succeed with a small, well-made turbine than to struggle with a large, complex one.
- Document everything. Photos, diagrams, and notes will help with repairs and upgrades.
- Test subassemblies on the ground first. Spin the rotor with the generator attached to ensure smooth operation before mounting it high up.
- Use modular components. If you want to upgrade a generator or controller later, modularity saves time and expense.
- Join local or online maker communities. You’ll find plans, parts, and troubleshooting tips that save years of trial and error.
Resources, Plans, and Further Reading
There is a vibrant DIY wind community. Look for open-source plans, local makerspaces, and publications dedicated to small wind energy. Vendors provide complete kits and components, and many hobbyists sell used generators or blades. When seeking plans, favor ones with documented test results and good community feedback.
Pros and Cons — Is a DIY Wind Turbine Right for You?
| Pros | Cons |
|---|---|
| Hands-on learning and skill development | Requires time, tools, and technical skills |
| Potential cost savings for small-scale needs | Variable performance depending on site |
| Energy independence and satisfaction | Maintenance and occasional repairs needed |
| Customizable to your needs | May require permits and adherence to regulations |
Real-World Example: A Simple Backyard Turbine Project
Imagine a project that uses a 1.5-meter rotor with 3 wooden blades, a PMG rated for low RPM, a 10-meter guyed tower, and a small battery bank to power lights and small appliances in a weekend cabin. The build took careful planning but was completed in stages over a few months: blade shaping, hub fabrication, generator mounting, and final tower erection. The owner measured wind speed and chose a tower height that avoided nearby trees. The system required occasional maintenance and adjustments to the dump load controller, but provided steady supplemental charging and the local satisfaction of a wind-powered light.
This kind of small, pragmatic project is achievable for a person with basic workshop tools and an appetite for learning.
Keeping It Sustainable and Responsible
If your motivation is sustainability, remember to think about the full lifecycle of your turbine. Use durable materials that will reduce frequent replacements and choose batteries with sensible end-of-life recycling plans. Salvaging parts from old equipment can be ecologically friendly and cost-effective, but be mindful of hazardous components (like lead-acid battery disposal) and handle them responsibly.
When to Consider Buying a Kit or Hiring a Professional
If you want quicker installation, guaranteed warranties, or a turbine that meets specific certifications for grid connection, consider a commercial kit or a professional installer. Kits offer matched components and simpler permitting, and professionals can handle tower erection and electrical interconnection safely and to code. Even if you build much of the system yourself, consulting with an electrician or structural engineer for critical steps (e.g., foundation design, grid interconnect) is a wise investment.
Checklist Before You Start Building
- Have you measured your wind resource or consulted reliable data?
- Have you checked local permitting and utility interconnection rules?
- Do you have access to the necessary tools and a safe place to work?
- Have you chosen a generator and matched rotor design?
- Do you have a plan for electrical safety and battery management?
- Can you safely raise and lower the tower for maintenance?
Final Thoughts on the Journey
Building your own wind turbine is more than a weekend project; it’s an invitation into a hands-on practice that blends science, craftsmanship, and responsible planning. You’ll encounter problems to solve, skills to learn, and the quiet satisfaction that comes from generating your own power. Whether you’re a weekend tinkerer or someone seeking real energy independence, a thoughtful approach will maximize your success: measure the wind, choose the right components, prioritize safety, and plan for maintenance. In doing so you’ll not only build a machine — you’ll build a small, personal chapter in the renewable energy movement.
Conclusion
Building your own wind turbine is an achievable and rewarding pursuit when approached with careful planning, attention to safety, and realistic expectations about costs and performance; by assessing your wind resource, choosing appropriate materials and a compatible generator, designing for structural and electrical safety, and committing to regular maintenance, you can create a reliable small-scale system that provides energy, education, and the satisfaction of harnessing the wind.
Как вам статья?

